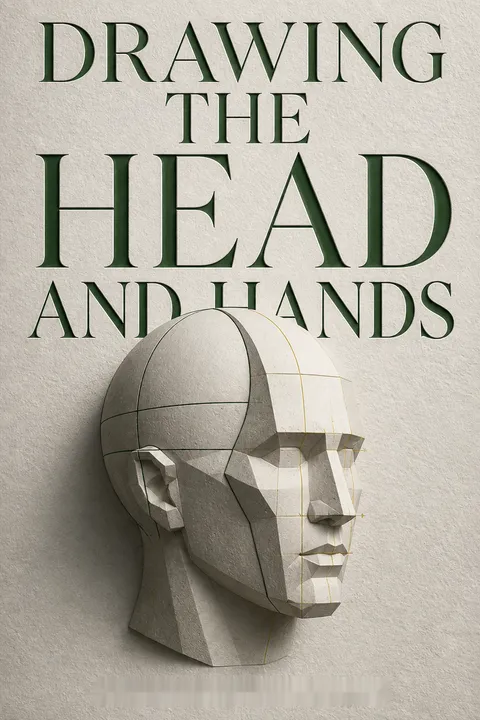


Key Takeaways
Build the skull in space before drawing a single feature.
Construct the whole head. Loomis begins with a rounded cranium, flattened at the sides, then attaches the face and jaw. A brow line crossing a center line marks the head’s orientation. These guides let the artist turn or tilt the construction without losing the relationship between its parts. The method is often called the ball and plane: a simple rounded form joined to the front plane of the face.
Imagine the hidden side. Draw the head as a complete solid object, including the far side that cannot be seen. This prevents features from floating on a flat outline and helps the artist judge thickness, position, and perspective. The visible ear, eye, or cheek makes sense only in relation to the whole structure.
What's striking is how the method changes drawing from copying contours into reasoning about form. The unseen side acts as a test: if the artist can imagine the head continuing behind the visible surface, the features are more likely to sit convincingly in space. This resembles model-based thinking in fields such as engineering, where a working representation helps explain what cannot be directly observed. The flattened sphere is a practical scaffold, not a literal account of every skull. Its value lies in making spatial relationships drawable, not in forcing every individual into one ideal shape.
Use landmarks to place features before polishing their shapes.
Locate the cross first. The intersection of the brow line and the center line is Loomis’s key landmark. It establishes the face’s direction and gives the artist a reference for balancing features on both sides. From there, guide lines help position the forehead, nose, chin, ears, and eyes. The point is not to make every face identical, but to replace uncertain guessing with visible relationships.
Measure in simple units. For an average adult head, Loomis divides the face into three approximate vertical zones: forehead, nose, and lower face. He also uses a basic unit system to estimate the head’s width and height. These measures provide a starting check when a feature seems misplaced. If the eyes or mouth look wrong, reconsider their position within the construction before changing their shape.
Landmarks turn proportion into a debugging tool. Instead of endlessly adjusting an eye that seems wrong, the artist can ask whether the brow line, head tilt, or face width is wrong first. That sequence matters because local fixes often disguise a structural problem rather than solve it. A useful caution is that Loomis’s measurements describe averages, not rules of nature. Real faces vary, and a likeness often depends on noticing exactly where the sitter departs from the average.
Turn rounded anatomy into planes to make heads feel solid.
Read the head as surfaces. Loomis starts with the skull’s rounded mass, then simplifies its surface into broad planes: forehead, cheek, nose, jaw, and other changes of direction. These planes help describe the head as a solid form rather than a smooth outline. They are especially useful when the face turns or tilts, because the angles remain easier to track than a string of small contours.
Let light reveal structure. A single light source makes the pattern easier to understand. The artist observes the lit planes, the gradual transition through halftone, and the shadowed planes. In drawing, the direction of the strokes can reinforce a plane even when the tone changes little. Too much blending erases the structure; too little can make the head look cut from stone.
The planes are a bridge between anatomy and design. They reduce visual complexity while preserving the information that makes a face turn in space, much as a map leaves out detail to clarify a route. This also explains why an intentionally simplified drawing can feel more alive than a meticulous copy. Loomis’s single-light exercise is a teaching device, not a requirement for every finished image. Complex lighting can be convincing too, but it is harder to analyze before the basic form is understood.
Draw facial expressions as moving anatomy, not decorative lines.
Understand what moves. The skull provides the fixed structure, while muscles shift the cheeks, lips, brows, and eyelids. Loomis argues that an expression becomes convincing when the artist knows which forms move and how. The mouth is not a flat mark: lips wrap around the rounded muzzle, and the lower jaw drops while the upper jaw stays fixed. The eyes are also rounded forms, with lids lying over the eyeballs.
Study expressions in a mirror. In a smile, the cheeks rise and bunch, changing the folds around the mouth and eyes. Loomis warns that dark, heavy creases can make a smile look like a sneer, and that teeth are often better suggested than outlined individually. A mirror lets artists observe these changes directly, while keeping the head’s underlying construction in view.
Anatomical understanding gives expression a cause, not just a symbol. A curved mouth alone can read as a smile, but the cheeks, eyes, and surrounding folds determine whether the face feels genuinely amused or merely marked with a grin. This is a useful lesson in visual communication: meaning often comes from coordinated signals, not one prominent feature. The mechanical explanation has limits, since expression also depends on context and individual habits. Still, anatomy gives the artist a reliable way to build the visible evidence of emotion.
Make likeness by changing underlying structure, not adding details.
Search for what is distinctive. Faces differ in the shape of the cranium, the width of the jaw, the prominence of the cheekbones, and the spacing and size of features. Loomis treats these relationships as more important than rendering every small mark on the surface. A narrow head with a receding chin creates a different impression from a broad head with a heavy jaw, even before hair or wrinkles are added.
Build character from structure. The artist can first identify the broad bone shapes, then observe how flesh fills or softens them. Changing the spacing between features or the proportions of the forehead, nose, and lower face can create different types. This applies to drawing a particular sitter as well as inventing a character. Small details help only after the larger arrangement is convincing.
This approach aligns with a basic principle of visual recognition: people notice relationships among features, not merely isolated eyes, noses, and mouths. Structural changes therefore carry more identifying weight than surface decoration. It also gives caricature a sound foundation, since exaggerating a real proportion is more coherent than randomly enlarging features. Yet structure cannot explain every aspect of likeness. A person’s expression, posture, and familiar asymmetries can matter greatly, so the construction should guide observation rather than replace it.
Let long, decisive lines organize detail into expressive rhythm.
Draw the larger movement. Loomis uses rhythm to describe the flow that links forms across a drawing. It may come from a curve opposed by an angle, or from a long line that captures the direction of a cheek, brow, or hair mass. Rhythm is not simply smoothness. A head can combine rounded forms with blocky ones, and the contrast gives it both movement and weight.
Train the arm, not just the fingers. Loomis recommends making broad, free strokes with the wrist and arm rather than building every edge from cramped, tiny marks. Large drawings can help develop that movement. The goal is not to imitate a camera’s record of every surface irregularity, but to choose lines that explain the form. Practice makes this kind of selection more natural.
Rhythm describes a kind of embodied judgment: the hand learns to anticipate the form before the pencil commits to it. That makes drawing practice more than repetition of finished images; it is training in coordinated movement and visual selection. Broad strokes also expose hesitation, which tiny marks can conceal. There is no universal formula for a rhythmic line, however. A deliberate, angular style may be right for one subject, while another calls for softer movement. The useful standard is whether the marks clarify the particular form.
Change facial proportions with age, especially the child's eye line.
Track growth, not just wrinkles. Loomis explains age chiefly through changing proportions. In a baby, the cranium is large compared with the small face, placing the eyes low in the head. As a child grows, the face lengthens and the eyes appear higher relative to the skull. By school age they approach the adult position; teenagers often have near-adult proportions, even while the face still looks youthful.
Use surface changes selectively. Older faces show more bone, sagging flesh, and deeper creases, particularly around the cheeks, eyes, and mouth. Loomis advises emphasizing the major forms and folds rather than mapping every wrinkle. For younger subjects, a broad cranium, full cheeks, and a small chin help preserve a childlike impression. These are guides to compare with the individual, not templates to impose.
Age is a structural problem as much as a texture problem. That distinction prevents a common shortcut: adding wrinkles to an otherwise adult face and expecting it to read as old, or shrinking an adult head to make a child. Loomis’s progression gives artists a sequence to observe, from skull-to-face proportions to surface changes. His descriptions are generalized, and individual development varies. The strongest application is comparative: study how one person’s proportions and soft tissues differ from the relevant average, rather than relying on age labels alone.
Build the palm as a hollow cup, then arrange fingers around it.
Start with the palm’s volume. The hand is not a flat paddle with fingers attached. Its palm hollows inward, while the back forms a curved surface. Loomis simplifies the palm into padded blocks around that hollow, including the thumb base, the heel, and the area beneath the fingers. This construction explains how a hand can cup liquid or close around an object.
Make the fingers obey the grasp. The fingers curl toward the palm, while the thumb works across them from a different direction. Loomis offers useful comparisons: the middle finger helps establish hand length, the index finger is slightly shorter, and the little finger reaches roughly to the upper joint of the neighboring finger. In a pose, however, the visible spacing and foreshortening matter more than memorized measurements. Studying one’s own hand supplies a model at any moment.
The cup is a functional model: it explains the hand’s shape by asking what the shape can do. That is often more effective than memorizing an inventory of bones, because grasping organizes the palm, thumb, and fingers into one action. The same principle applies to drawing a hand holding a tool or reaching for an object: the intended contact determines the pose. Proportions help, but extreme viewpoints can compress them dramatically. The artist must judge the particular view rather than force every hand into a standard diagram.
Practice from life to test structure, then choose what to simplify.
Use references actively. Loomis recommends drawing from people, photographs, magazine images, mirrors, and one’s own hands. He discourages tracing as a substitute for understanding, but acknowledges that photographs can help with subjects, such as babies, who move too quickly to pose. A productive study asks the artist to identify the construction, feature placement, and planes, rather than merely copy the outline.
Expect revision. Skill develops through repeated attempts, including discarding a weak drawing and beginning again. A useful exercise is to sketch a head in stages: first the solid construction, then the proportions and features, then the planes and tone. Comparing those stages reveals where the drawing went off course. Patience matters because technical knowledge becomes useful only when applied through practice.
The method treats a reference as evidence to interpret, not an answer to reproduce. That distinction protects the learner from confusing accuracy with tracing and encourages transfer: the same construction can be applied to a new pose or person. Staged studies also make mistakes legible, which is essential for improvement. Photography remains a legitimate tool, especially for fleeting expressions and restless subjects. The key question is whether the artist is learning to see the underlying structure or merely reproducing a surface that happens to be in front of them.
Treat age and gender conventions as clues, not templates.
Separate structure from style. Loomis describes adult female heads as generally showing lighter bone and muscle, and discusses roundness or angularity as ways artists shape a subject’s appearance. He also notes that children, adults, and older people call for different choices in how much anatomy or surface detail to show. These observations offer a vocabulary for drawing, but the book’s gendered ideals also reflect the commercial illustration culture of its time.
Let the sitter lead. A face should not be forced into a supposedly feminine or masculine formula. Observe its actual jaw, brow, cheek, and feature placement, then decide how strongly to emphasize them. For older subjects, Loomis recommends preserving the forms that establish age and likeness while leaving out incidental wrinkles. Simplification should make the person clearer, not turn them into a stereotype.
This section benefits from separating two questions: what anatomy is present, and what visual conventions an image uses to signal identity. Loomis’s guidance is historically specific, especially where it links beauty or gender to particular shapes. Treating those claims as stylistic conventions rather than biological laws preserves their practical value without restricting observation. The same caution applies to age: smoothing every line can erase character, while exaggerating all of them can reduce a person to a caricature. Selective emphasis works best when grounded in the sitter.
Analysis
Drawing the Head and Hands is a practical art manual built around a shift in attention. The beginner sees a face as eyes, nose, mouth, and outline. Loomis asks the artist to see a volume with an internal structure, then to locate the features within it. The book’s sequence follows that change in perception: simplify the cranium, orient it in space, place the features, understand the anatomy that moves them, and use planes and tone to make the result solid. The chapters on age and hands extend the same logic to forms that change or act.
Its most durable insight is not any single proportion chart. It is the idea that construction makes observation more precise. A center line can explain why paired features differ in perspective. A model of the hollow palm can explain why fingers curl as they grasp. Anatomy connects a visible smile to movement beneath the skin. Across these examples, drawing becomes a form of causal reasoning: the artist asks what structure could have produced the marks on the surface.
The book also insists that technical accuracy serves expression rather than replacing it. Loomis encourages rhythm, selective detail, invention, and individual treatment, while warning against heads that look mechanically standardized. That tension is productive. A construction model needs consistency to teach, but a portrait needs sensitivity to the person who departs from the model. His proportions should therefore be treated as measuring instruments, not laws.
Some of the advice about gender and beauty reflects the mid-century commercial art world in which the book was written. Modern artists can retain the close observation of bone, flesh, and proportion while questioning its inherited categories. Overall, the book’s method is valuable because it joins disciplined analysis to artistic choice: learn enough structure to see clearly, then decide what the drawing needs to say.
Review Summary
Drawing the Head and Hands receives mostly positive reviews, with readers praising its detailed instructions and beautiful illustrations. Many consider it a classic resource for artists learning to draw portraits and hands. Reviewers appreciate Loomis' breakdown of fundamentals and his insights on applying knowledge to artistic work. Some note the book's dated aspects, particularly regarding diversity and gender representation. While most find it highly valuable, a few critics argue it lacks depth in certain areas or prefer other resources. Overall, it remains a widely recommended text for artists seeking to improve their skills.
People Also Read

Glossary
ball and plane
cranium plus facial planeLoomis’s basic construction for a head: a rounded cranium, flattened somewhat at the sides, joined to the front plane of the face and jaw. The artist divides this form with guide lines to establish orientation and feature placement. It is a drawing scaffold for representing a solid head from different angles, not a claim that every skull has the same shape.
middle line
center line of the headA construction line running down the center of the face and head. In combination with the brow line, it establishes the head’s direction and helps the artist place features in perspective. The middle line is not necessarily vertical on the page: it follows the turn or tilt of the head and helps balance the two sides of the face.
four divisions
child-face proportion guideA way Loomis divides the face below the brow into four approximate sections when drawing babies and young children. The divisions help locate the eyes, nose, mouth, and chin as a child’s face grows in relation to the cranium. Their positions shift with age, so the guide is a starting point for observation rather than a fixed template.
planes
simplified head surfacesThe broad, simplified surfaces into which Loomis breaks the head, such as the forehead, cheeks, and sides of the nose. Thinking in planes helps an artist understand how the head turns in space and how light falls across it. Their edges can be emphasized or softened to describe form, character, and the transition from light to shadow.
happy muscles
muscles that lift the cheeksLoomis’s informal label for muscles that pull the mouth’s corners upward and draw the cheeks into a smile. Their action changes the flesh around the mouth and eyes, creating characteristic folds and bulges. The term is a teaching shorthand for understanding visible expression, not a formal anatomical name.
FAQ
1. What is "Drawing the Head and Hands" by Andrew Loomis about?
- Comprehensive guide to drawing: The book is a classic instructional manual focused on teaching artists how to draw realistic and expressive heads and hands.
- Emphasis on construction: Loomis introduces a systematic, construction-based approach, using simplified forms like the ball and plane to build heads and hands accurately.
- Covers all ages and types: The book addresses drawing men, women, children, babies, and hands, providing specific advice for each.
- Practical and philosophical: Loomis combines technical instruction with motivational advice, encouraging artists to develop both skill and personal expression.
2. Why should I read "Drawing the Head and Hands" by Andrew Loomis?
- Foundational for artists: It’s considered essential reading for anyone serious about figure drawing, portraiture, or illustration.
- Time-tested methods: Loomis’s construction techniques are widely used by professionals and art schools for their effectiveness and clarity.
- Covers common challenges: The book addresses typical difficulties artists face, such as proportion, perspective, and placement of features.
- Inspirational tone: Loomis’s writing is encouraging, helping readers overcome impatience and frustration in their artistic journey.
3. What are the key takeaways from "Drawing the Head and Hands" by Andrew Loomis?
- Construction is crucial: Building heads and hands from basic forms ensures accuracy and consistency in drawing.
- Proportion and placement: Understanding the standard measurements and divisions of the head and hand is vital for realistic results.
- Anatomy matters: Even if you don’t memorize every bone or muscle name, knowing their placement and function improves expression and believability.
- Practice and experimentation: Loomis stresses the importance of drawing from life, photographs, and imagination, and encourages playful experimentation with types and expressions.
4. What is the Loomis Method for drawing heads, as described in "Drawing the Head and Hands"?
- Ball and plane approach: Start with a ball (cranium) and add a flattened plane for the face, establishing the head’s basic structure.
- The all-important cross: Draw a vertical and horizontal line (the “cross”) to determine the head’s orientation and the placement of features.
- Proportional divisions: Divide the face into equal thirds (hairline to brow, brow to nose, nose to chin) for accurate feature placement.
- Adaptable to any angle: The method allows you to construct heads in any pose or perspective by rotating the ball and adjusting the cross.
5. How does Andrew Loomis recommend learning to draw hands in "Drawing the Head and Hands"?
- Study your own hands: Loomis emphasizes using your own hands as the best reference for understanding structure and movement.
- Block forms and anatomy: Break the hand into blocky forms and learn the basic anatomy, focusing on the palm, fingers, and thumb.
- Proportional relationships: Learn the comparative lengths and alignments of fingers, knuckles, and palm for accurate drawings.
- Practice varied poses: Draw hands in different actions, from multiple angles, and in foreshortened views to build confidence and skill.
6. What are the main differences in drawing men’s, women’s, and children’s heads according to Andrew Loomis?
- Men’s heads: Emphasize blockiness, visible bone and muscle structure, and stronger planes for a more rugged look.
- Women’s heads: Use softer, rounder forms, less pronounced bone structure, and delicate features; still maintain underlying construction for accuracy.
- Children’s and babies’ heads: Proportions differ significantly—larger craniums, smaller faces, and wider-set eyes; features are rounder and less defined.
- Adjust for age and character: Loomis provides specific construction guides and proportion charts for each group, highlighting the importance of adapting your approach.
7. How does "Drawing the Head and Hands" by Andrew Loomis address facial expressions and character?
- Muscles and mechanics: Loomis explains the key facial muscles responsible for expressions, such as the “happy” and “unhappy” muscles.
- Construction first, expression second: Accurate placement of features within the head’s structure is essential before adding expression.
- Variety through spacing: By varying the proportions and spacing of features, you can create endless character types and expressions.
- Practice with mirrors and photos: Loomis suggests using mirrors and photographs to study and replicate a wide range of expressions.
8. What role does anatomy play in Andrew Loomis’s approach in "Drawing the Head and Hands"?
- Foundation for realism: Understanding the skull and muscles beneath the skin is crucial for believable heads and hands.
- Simplified for artists: Loomis focuses on the most important bones and muscles, emphasizing their placement and function over memorizing names.
- Expression and movement: Knowledge of anatomy helps artists depict natural expressions and dynamic poses.
- Applies to all ages: The anatomical approach is adapted for men, women, children, and babies, with attention to age-related changes.
9. How does Andrew Loomis teach the use of planes, light, and shadow in "Drawing the Head and Hands"?
- Planes define form: Loomis breaks the head into basic and secondary planes to clarify structure and guide shading.
- Light and shadow modeling: He explains how to use a single light source to create clear, simple shadows that reveal the form.
- Direction of strokes: In drawing, the direction of your pencil strokes should follow the planes to enhance the sense of volume.
- Avoid over-blending: Loomis warns against excessive blending, which can make drawings look flat or photographic rather than lively and solid.
10. What advice does Andrew Loomis give for developing rhythm and design in head and hand drawings?
- Rhythm is flow: Loomis encourages artists to seek the longest, most expressive lines in a head or hand, rather than focusing on small details.
- Use the whole arm: Drawing with the arm, not just the fingers, helps create rhythmic, confident lines.
- Combine curves and angles: Mixing blocky and rounded forms adds vitality and interest to drawings.
- Design over detail: Consider the overall design and pattern of lights, shadows, and forms for a more artistic result.
11. How does "Drawing the Head and Hands" by Andrew Loomis help artists overcome common drawing mistakes?
- Construction prevents errors: Starting with the ball and plane method ensures features are placed correctly, avoiding distorted faces.
- Emphasizes measurement: Loomis provides clear proportion guides and unit systems to help artists check their work.
- Encourages analysis: He suggests drawing construction lines over photos or clippings to understand and correct mistakes.
- Practice and patience: Loomis stresses that skill comes from repeated practice and learning from unsuccessful attempts, not from shortcuts.
12. What are the best quotes from "Drawing the Head and Hands" by Andrew Loomis and what do they mean?
- “May it give wings to your pencil, to carry you to the heights of good draftmanship.” — Loomis’s dedication, expressing his hope that the book will inspire artistic growth.
- “Let me say at the beginning that to draw a head effectively is not a matter of ‘soul searching’ or mind reading. It is primarily a matter of interpreting form correctly in its proportion, perspective, and lighting.” — Emphasizes the importance of technical skill over mystical talent.
- “The big difference between the completely amateur attempt and the well-grounded approach is that the beginner starts by setting eyes, ears, noses, and mouths into blank white space... We must somehow get into the third dimension of thickness.” — Stresses the necessity of constructing the head in three dimensions.
- “Skill is the ability to overcome obstacles, the first of which is usually lack of knowledge about the thing we wish to do.” — Encourages perseverance and learning as the path to mastery.
- “No ‘knack’ of drawing heads can compete with sound knowledge.” — Underscores the value of understanding over relying on tricks or shortcuts.
Download PDF
Download EPUB
.epub digital book format is ideal for reading ebooks on phones, tablets, and e-readers.